

Disclosure: This article contains affiliate links. We may earn a commission from purchases at no extra cost to you, which helps our travel content.
The morning mist clung to the ancient cedars as I made my way up the stone pathway, camera in hand, breath visible in the crisp autumn air. Nikko had called to me for years—this sacred place where human artistry and natural splendor exist in such harmonious balance. As someone who has documented cultural treasures across continents, I found myself humbled by the photographic possibilities awaiting in this mountain sanctuary just two hours from Tokyo. Whether you're wielding a professional camera or simply your smartphone, Nikko offers a visual feast that transcends the ordinary tourist snapshot. The vermilion shrines against emerald forests, the play of light through centuries-old trees, the intricate carvings that tell stories of Japan's spiritual heritage—all create a photographer's paradise, particularly when bathed in autumn's golden palette. Join me as I share my weekend photography journey through this UNESCO World Heritage site, where every angle reveals another layer of Japan's cultural soul.

Planning Your Photographic Pilgrimage
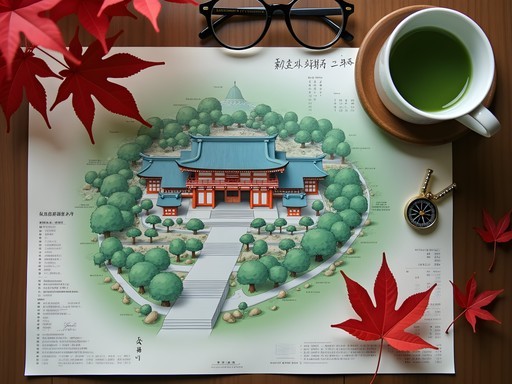
After thirty years studying cultural anthropology, I've learned that preparation enriches experience—especially when that experience involves photography in a place as visually complex as Nikko. Before boarding my train from Tokyo, I spent evenings with a detailed map marking potential shooting locations and researching the significance behind Nikko's most photogenic structures.
Nikko's UNESCO World Heritage site encompasses over 100 buildings and structures, but photographers with limited time should focus on the Toshogu Shrine complex, Futarasan Shrine, and Rinnoji Temple. Each offers distinct architectural elements that respond differently to changing light conditions throughout the day.
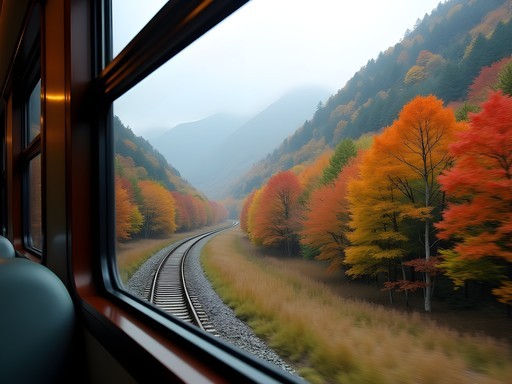
I recommend arriving in Nikko by mid-afternoon the day before your photography expedition begins. This allows you to settle into your accommodation, perhaps take a preliminary walk to scout locations, and prepare for an early start the next morning. The JR Pass is economical if you're traveling extensively in Japan, but the limited express train from Tokyo's Asakusa Station is perfectly adequate for a weekend trip.
While planning, remember that Nikko's temples require entrance fees (around 1,000-2,000 yen each), with combination tickets available. Factor these costs into your budget, along with potential tripod fees at certain locations. As a cultural anthropologist, I've learned that respecting site regulations is not just about following rules—it's about honoring the sacred spaces we're privileged to photograph.

💡 Pro Tips
- Purchase the Nikko All Area Pass if you plan to visit multiple sites
- Download offline maps of the temple complex beforehand
- Check sunrise and sunset times for your specific dates to plan golden hour shoots
Morning Light: Toshogu Shrine's Golden Treasures
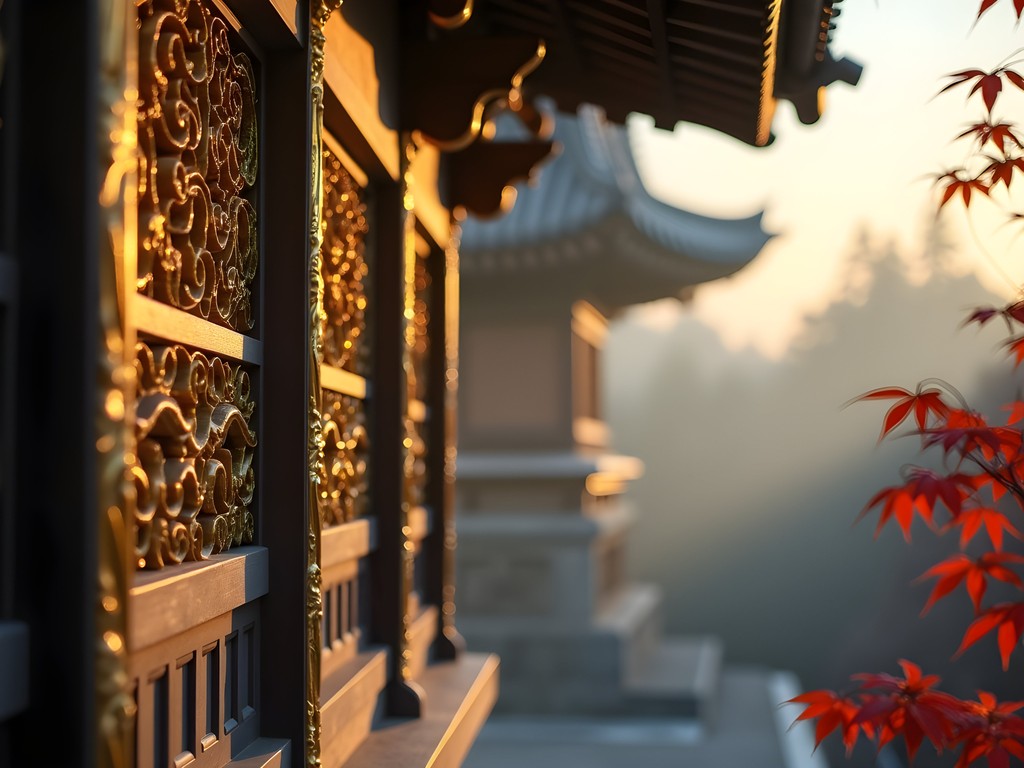
I've witnessed sunrises on five continents, but few compare to watching dawn break over Nikko's forested mountains, gradually illuminating the gold-leaf details of Toshogu Shrine. Arriving by 6:30 AM—well before the 8:00 AM opening—allowed me to capture the exterior structures bathed in soft morning light without crowds.
The shrine complex doesn't officially open until 8:00 AM (earlier in summer months), but positioning yourself near the entrance provides stunning exterior shots as the morning light gradually intensifies. My travel tripod proved invaluable during these low-light conditions, allowing for crisp images without raising ISO levels excessively.
Once inside, make your way directly to the Yomeimon Gate—often called the 'Sunlight Gate' for good reason. Between 9:00-10:00 AM, sunlight illuminates its intricate carvings and gold elements in a way that simply disappears later in the day. The famous Sleeping Cat carving and Three Wise Monkeys relief also benefit from morning light, which enhances their detailed craftsmanship.
I spent nearly an hour photographing the Five-Story Pagoda, experimenting with different focal lengths. While my instinct was to capture it in its entirety, some of my most compelling images came from focusing on architectural details—the curved eaves, the ornate brackets, the weathered wood against gold accents—all telling stories of the craftsmen who created them centuries ago.
As an anthropologist who spent decades documenting traditional knowledge systems, I found myself equally drawn to capturing the shrine attendants preparing for the day, their movements following patterns established generations ago. These human elements add context and scale to your architectural photography, connecting ancient structures to living tradition.
💡 Pro Tips
- Use a polarizing filter to reduce glare on gold leaf details
- Shoot the Yomeimon Gate before 10 AM for optimal lighting
- Look for natural framing opportunities using the towering cedar trees
Midday Magic: Working with Challenging Light
Many photographers pack away their cameras during midday hours, but in Nikko, this would be a mistake. When harsh sunlight makes exterior shooting difficult, I moved indoors to the dimly lit temple interiors where tripods are typically prohibited. This is where a mirrorless camera with excellent high-ISO performance becomes invaluable. My Sony captured the ornate ceiling paintings of Rinnoji Temple with remarkable clarity despite the challenging light conditions.
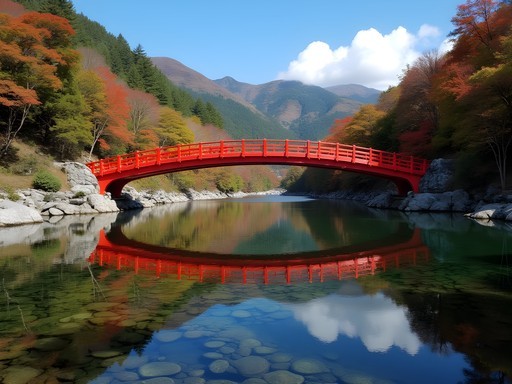
Midday also offers the perfect opportunity to photograph Shinkyo Bridge, where the overhead sun illuminates the vermilion structure against the dark waters below. I discovered that positioning myself slightly downstream provided a more compelling composition, with the sacred bridge framed by moss-covered rocks and dappled water.
Another midday strategy involves seeking locations where dappled light filters through the cedar forest. The path to Takino Shrine provided extraordinary opportunities for capturing light rays piercing through the canopy—a phenomenon the Japanese call 'komorebi.' These ethereal light patterns are most pronounced during midday hours.
During my anthropological fieldwork years, I learned that understanding the cultural context deepens one's appreciation of physical spaces. This holds true for photography as well. The stone lanterns lining Nikko's pathways aren't merely decorative elements—they represent spiritual offerings and guide worshippers. Photographing these lanterns from a low angle against the midday sky created dramatic silhouettes that conveyed their ceremonial significance.
For those struggling with contrast during bright midday conditions, bracketing exposures for later HDR processing can salvage otherwise impossible shots. However, I often find that embracing the contrast—allowing deep shadows to frame brightly lit architectural elements—results in more dramatic, emotive images that capture Nikko's spiritual essence.

💡 Pro Tips
- Use spot metering when photographing temple interiors
- Look for patterns of light and shadow on stone pathways
- Carry a microfiber cloth to protect your lens from unexpected rain showers

Autumn Foliage: Timing Nature's Perfect Canvas
My decades studying traditional knowledge systems across cultures taught me that timing is everything—especially when it comes to capturing nature's ephemeral beauty. Nikko's autumn foliage typically peaks in late October through mid-November, creating a breathtaking backdrop for its sacred structures. The Japanese have a specific term—'koyo'—for autumn leaf viewing, considered as culturally significant as spring's cherry blossoms.
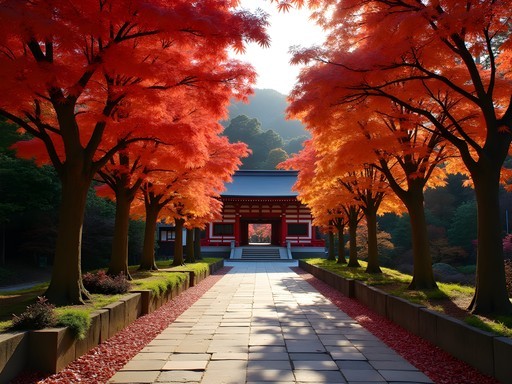
During my weekend visit, I found the maple-lined path to Taiyuin Temple particularly magnificent. The contrast between vermilion temple structures and the fiery maples creates a color harmony that seems almost deliberately designed. For the most impactful foliage photographs, I recommend using a polarizing filter to reduce glare on the leaves and enhance their natural saturation.
Lake Chuzenji and Kegon Falls, about an hour's bus ride from central Nikko, offer spectacular landscape opportunities when framed by autumn colors. The reflections of red and gold foliage on the lake's surface create mirror images that almost appear surreal in photographs. I arrived at the lake just before sunset, when the low-angled light illuminated the foliage from behind, creating a luminous quality impossible to achieve at other times of day.
One photography technique I employed was deliberately using a shallow depth of field to isolate specific leaves or branches against the soft backdrop of shrine structures. This selective focus creates intimate compositions that convey the relationship between Nikko's natural and built environments—a relationship central to Shinto spiritual practices.
While planning your autumn photography in Nikko, remember that weekends draw substantial crowds during peak foliage season. I found Thursday and Friday significantly less crowded, allowing for cleaner compositions without tourists inadvertently wandering into frame. If weekend visits are unavoidable, arrive at first light to capture iconic locations before the tour buses arrive.

💡 Pro Tips
- Check the Japan Meteorological Corporation's foliage forecast before booking
- Bring a small reflector to fill shadows when photographing temple details against bright autumn backgrounds
- Consider a graduated neutral density filter for balancing bright sky with darker temple grounds
Twilight Transitions: Capturing Sacred Spaces at Blue Hour
Throughout my travels documenting traditional practices across continents, I've found that transitional moments often reveal the most profound aspects of sacred spaces. In Nikko, the blue hour—that magical period just after sunset—bathes the temple complex in ethereal blue light before darkness fully descends.
Most tourists depart by late afternoon, leaving photographers who linger the gift of near-solitude among these sacred structures. During my visit, I remained at Toshogu Shrine until closing, then positioned myself along the cedar-lined path for blue hour compositions. The contrast between the darkening sky and illuminated shrine buildings creates a mystical atmosphere that captures Nikko's spiritual essence in ways that daylight photography cannot.
Some areas of the complex close by 5:00 PM (earlier in winter months), but exterior views remain accessible along public pathways. I discovered that the area near Shinkyo Bridge offers extraordinary twilight compositions, with the vermilion structure gradually darkening against the blue-toned sky and river below.
This is when my travel camera truly proved its worth. Its excellent low-light performance and in-body stabilization allowed me to capture handheld shots when tripods weren't practical. For longer exposures—particularly of water features like sacred fountains—I found discrete places to brace my camera or use my compact tripod without disturbing other visitors.
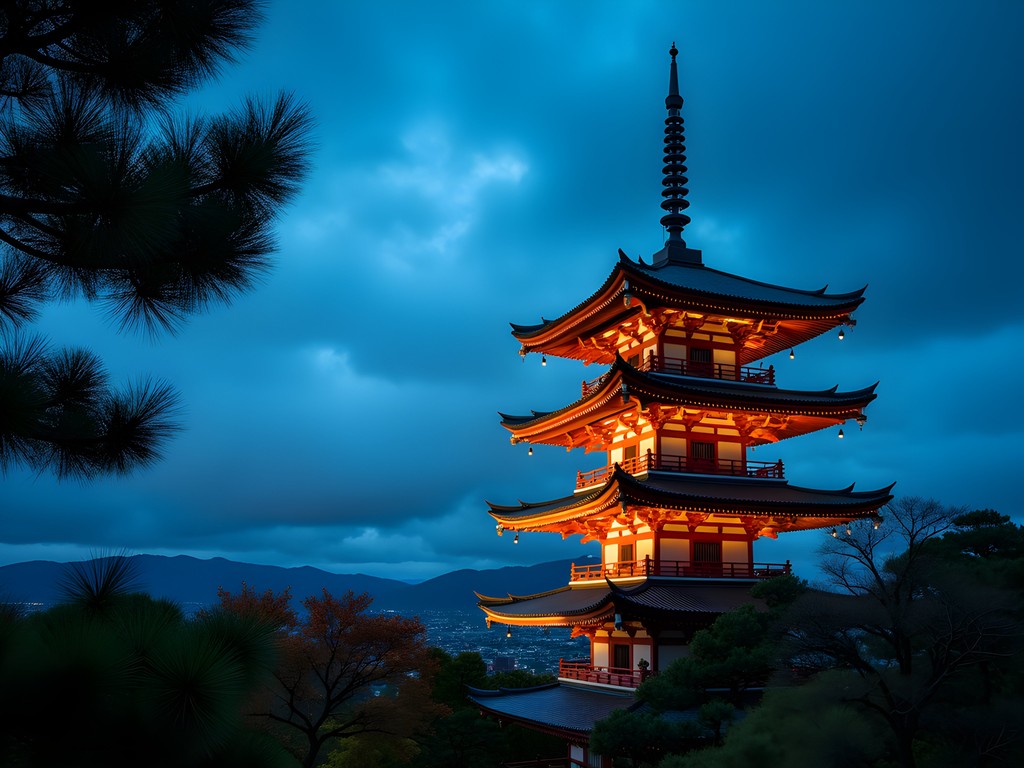
The illumination of certain structures begins as darkness falls, creating another photographic opportunity. The five-story pagoda, when illuminated against the night sky, tells a different visual story than its daytime counterpart. These artificial lighting conditions require careful white balance adjustments—I typically set a custom white balance rather than relying on auto settings.
As an anthropologist, I've always been fascinated by how sacred spaces transform through daily cycles. Photographing Nikko at blue hour revealed how these temples were designed with an acute awareness of light's spiritual symbolism—a visual theology written in architecture and illumination that becomes most apparent during these transitional moments between day and night.
💡 Pro Tips
- Scout blue hour locations during daylight to ensure safe positioning later
- Bring a small flashlight with red light mode for adjusting camera settings without disrupting night vision
- Consider noise reduction techniques for long exposures as temperatures drop in evening hours
Final Thoughts
As I boarded the train back to Tokyo, scrolling through my weekend's photographic harvest, I felt that peculiar satisfaction that comes from capturing not just images, but essences. Nikko isn't merely photogenic—it's a visual dialogue between natural splendor and human devotion, between transient autumn colors and enduring sacred architecture. For photographers willing to rise before dawn, linger after dusk, and approach these sacred spaces with both technical skill and cultural respect, Nikko offers visual poetry beyond the ordinary travel snapshot. Whether you're documenting the intricate craftsmanship of Toshogu's carvings or the perfect symmetry of a maple leaf floating on a temple pond, remember that your camera is capturing not just a place, but centuries of spiritual and artistic heritage. I invite you to bring not only your camera to Nikko, but also your patience and curiosity. The rewards will fill both your memory card and your spirit.
✨ Key Takeaways
- Arrive early and stay late to photograph Nikko's temples without crowds
- Use autumn foliage as a vibrant natural frame for architectural elements
- Research the cultural significance of structures to inform more meaningful compositions
- Plan specific shots around optimal lighting conditions throughout the day
📋 Practical Information
Best Time to Visit
Mid-October to mid-November for autumn foliage; April for cherry blossoms
Budget Estimate
¥30,000-45,000 for a weekend (including mid-range accommodation, transportation, entrance fees, and meals)
Recommended Duration
2-3 days minimum for photography-focused visit
Difficulty Level
Easy To Moderate (Some Uphill Walking On Stone Paths)


Comments
mountainstar
OMG I'm going to Nikko in October!! This post came at the perfect time. Do you think early October or late October is better for the fall colors? I'm so excited now!!!
wanderfan
Late October is usually peak! I went Nov 2nd last year and it was still gorgeous but some trees were already bare.
mountainstar
Thanks!! Booking for Oct 25-27 then!
luckychamp
Those temple photos are amazing!
wavestar
Thanks for sharing! Really helpful tips
hikingfan
How much time do you recommend spending there? Trying to figure out if I can do it as a day trip from Tokyo or should stay overnight.
redway
Stay overnight if you can! You'll want that early morning light and there's so much to see beyond just Toshogu.
Savannah Torres
Agreed! We stayed two nights and still felt like we could have used more time. The lake area alone is worth a full day.
Nicole Russell
YES to everything in this post! I visited Nikko solo last November and your section on working with midday light was exactly what I needed to read beforehand. I actually used my circular polarizer to cut through the harsh light on the shrine's gold leaf - game changer! Also totally agree about staying overnight. I found a small ryokan near the lake and watching the morning fog roll in was pure magic. Did you make it to Kegon Falls? The long exposure shots there are incredible!
backpackrider
ooh good to know about the polarizer!
wanderlustace
That misty morning shot is everything! Really inspiring
redway
Been to Nikko 3 times now and here's my tip - get the Tobu Railway pass from Asakusa, way cheaper than individual tickets! Also the onsen at Chuzenji Lake area is perfect after a day of hiking and shooting. Francesca what lens did you use for those detail shots of the shrine carvings? They're razor sharp.
Francesca Morgan
Great tip on the railway pass! I used my 24-70mm f/2.8 for most shots, but switched to a 70-200mm for the carved details. The compression really makes those golden elements pop.
Savannah Torres
We took our kids to Nikko last fall and it was absolutely magical! Your tips about the morning light are spot on. My 8-year-old was mesmerized by the Three Wise Monkeys carvings at Toshogu. One thing I'd add for families - the walk up to Taiyuin Temple is steep but SO worth it for the quieter atmosphere and gorgeous autumn colors. We packed snacks and made it an adventure. The kids still talk about feeding the deer near Shinkyo Bridge!
wavestar
didn't know there were deer there! that's awesome
journeyfan
Going there in April - will I miss the autumn colors or is spring nice too? Also how early did you get to Toshogu to avoid crowds?
Francesca Morgan
Spring is beautiful too! The cherry blossoms around Lake Chuzenji are stunning. I got to Toshogu around 7:30am and had about 45 minutes before the tour groups arrived.
journeyfan
perfect thanks!!
backpackrider
wow those shrine photos are incredible!! definitely adding nikko to my list
Venture X
Premium card with 2X miles, $300 travel credit, Priority Pass