


Disclosure: This article contains affiliate links. We may earn a commission from purchases at no extra cost to you, which helps our travel content.
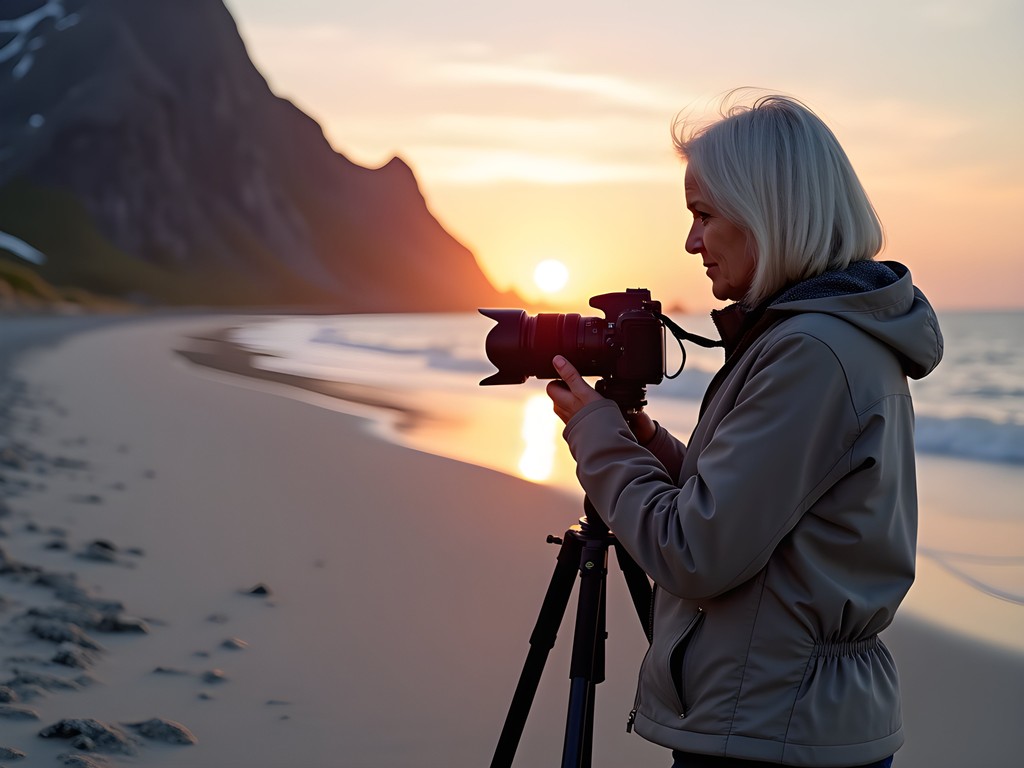
The first time I witnessed the midnight sun phenomenon in Norway's Lofoten Islands, I found myself utterly transfixed. Having spent decades documenting my travels between dental conferences across Europe, I've developed quite the eye for exceptional photographic conditions. However, nothing quite compares to the ethereal golden light that bathes these dramatic Arctic islands during summer months. As someone who specializes in night photography, the concept of 'night' takes on an entirely different meaning here above the Arctic Circle, where the sun refuses to set from late May through July. This unique lighting scenario presents both extraordinary opportunities and distinct challenges for photographers. After five visits to this archipelago during the midnight sun period, I'm delighted to share my comprehensive guide to capturing this magical Norwegian light—where technical precision meets artistic vision in one of Earth's most spectacular landscapes.

Understanding the Midnight Sun Phenomenon
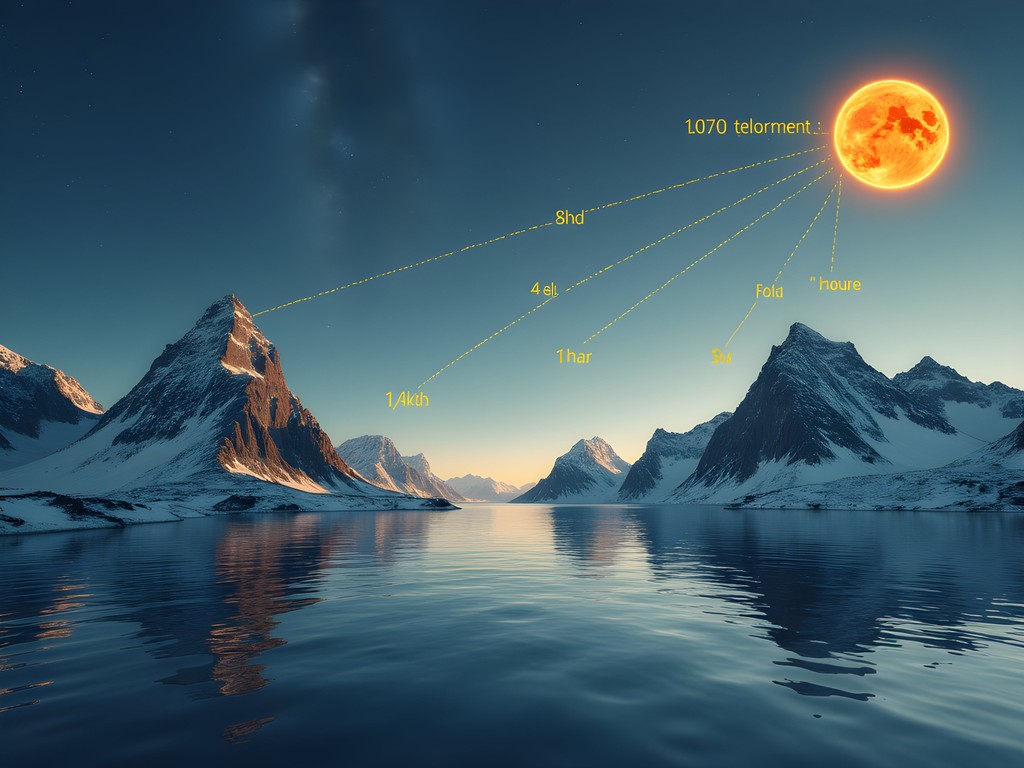
Before we delve into photographic techniques, it's worth understanding exactly what we're capturing. The midnight sun occurs in summer months within the Arctic Circle when the Earth's axial tilt positions the northern hemisphere toward the sun, preventing it from setting below the horizon for weeks or even months.
In the Lofoten Islands (68°N latitude), this creates approximately 24 hours of daylight from late May through mid-July, with the peak around the summer solstice (June 21st). However, this isn't simply 'daylight' as we typically understand it. What makes this phenomenon particularly captivating for photographers is the quality of light—for several hours around midnight, the sun hovers near the horizon, bathing the landscape in what photographers call 'golden hour' light, but extended for hours rather than minutes.
During my first visit in 2014 (between dental conferences in Oslo and Copenhagen), I was astounded by how the lighting conditions transformed familiar landscape photography principles. The sun's position creates dramatic side-lighting that accentuates textures in the mountains, while the low angle produces warm tones that seem almost artificially enhanced. This extended golden hour provides ample time for experimentation with compositions that would be impossible to achieve during the fleeting moments of sunset elsewhere.
💡 Pro Tips
- The midnight sun doesn't mean bright daylight 24/7—expect a softer, more directional light between 11 PM and 2 AM
- Check precise sunset/sunrise times for your specific dates as they change rapidly throughout the season
- Consider that the sun moves horizontally rather than vertically, creating unique shadow patterns
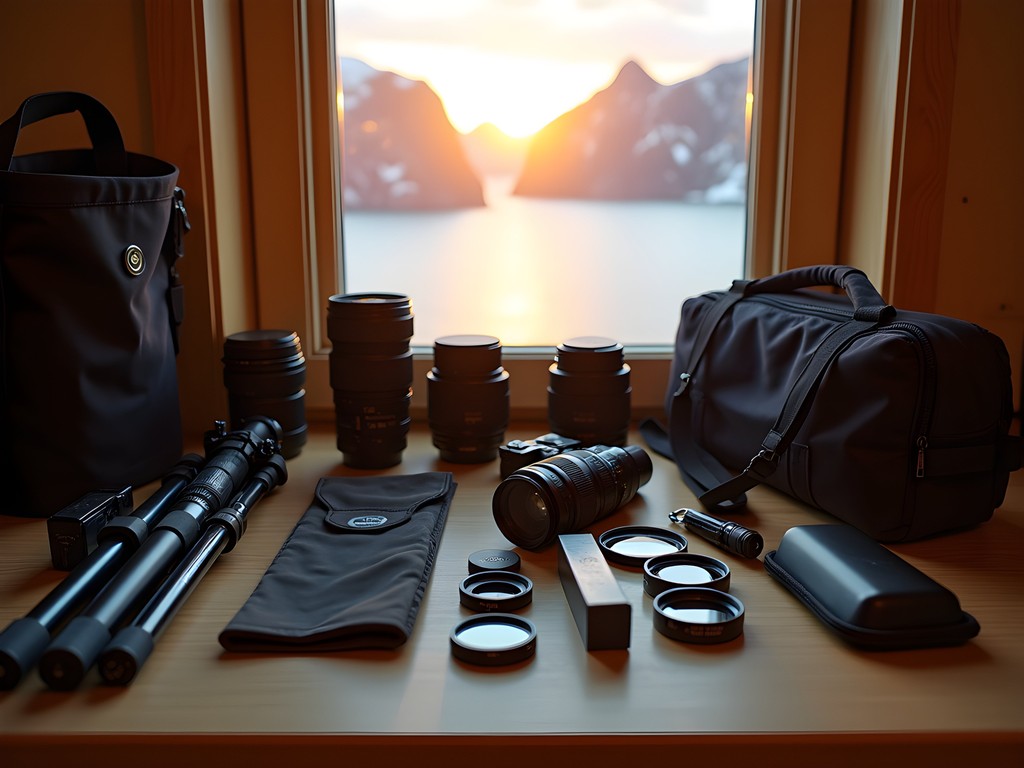
Essential Photography Gear for Midnight Sun
After years of photographing in varied conditions across Europe and Asia, I've refined my equipment choices for midnight sun photography. The extended golden light creates unique requirements that differ from standard night photography.
First and foremost, invest in a sturdy tripod. Despite the abundant light, you'll often want to use smaller apertures for depth of field, necessitating slower shutter speeds. My carbon fiber tripod has been invaluable—lightweight enough to carry up Lofoten's peaks yet stable against the archipelago's notorious coastal winds.
For lenses, I recommend bringing a versatile range. While wide-angle lenses capture the expansive landscapes beautifully, don't overlook telephoto options. The low-angle light creates compression effects that a telephoto lens enhances magnificently. My 24-70mm lens rarely leaves my camera during golden hour sessions, offering the versatility needed when light conditions evolve rapidly.
Filters are particularly crucial for midnight sun photography. A good circular polarizer helps manage reflections on water and enhances the already vibrant colors. More importantly, graduated neutral density filters balance exposure between bright skies and shadowed mountains—a common challenge when the sun hovers near the horizon. I've found that soft-edge graduated filters work best for Lofoten's jagged mountain profiles.
Finally, don't forget practical accessories: extra batteries (the extended shooting hours will drain them quickly), a remote shutter release for long exposures, and a good headlamp for navigating to and from locations. Despite the constant light, the terrain remains challenging.
💡 Pro Tips
- Bring a lens cloth and air blower—sea spray and dust are constant challenges in coastal environments
- Pack microfiber gloves that allow operation of camera controls while keeping hands warm in the cool Arctic air
- Consider a lighter kit if hiking to remote locations—the best light often requires some trekking
Prime Locations for Midnight Sun Photography
After five summer visits to Lofoten, I've identified several locations that consistently deliver spectacular midnight sun photography opportunities. Each offers unique compositional elements that interact beautifully with the extended golden light.
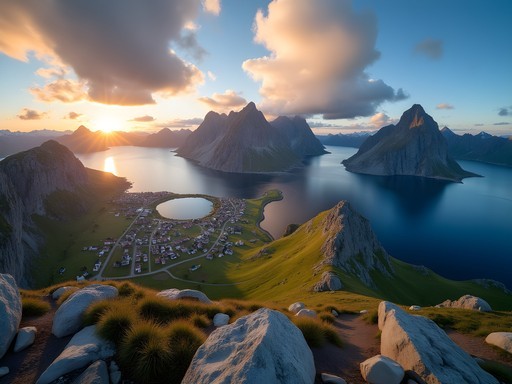
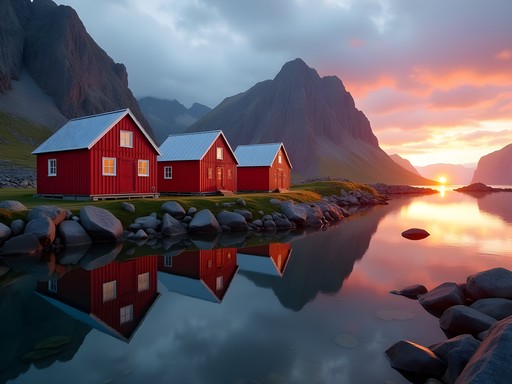
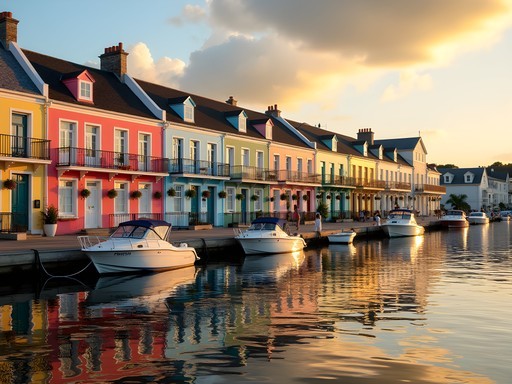
Haukland Beach remains my favorite midnight sun location. The wide, curved beach provides sweeping foreground interest while mountains create dramatic backdrops. Between midnight and 1 AM, the sun positions perfectly behind Veggen mountain, creating opportunities for sunstar effects when using smaller apertures. The beach's orientation makes it ideal for capturing the sun's trajectory as it skims the horizon.
Uttakleiv Beach (just around the headland from Haukland) offers fascinating foreground elements with its famous heart-shaped rock and distinctive stone formations. The midnight sun illuminates these features with striking side-lighting that emphasizes texture. Arrive early to scout compositions, as the tidal conditions dramatically alter available foreground elements.
Reine Overlook provides the classic Lofoten vista but transforms completely under midnight sun conditions. From this elevated position, you can capture the golden light bathing the fishing villages below while mountains reflect in the still fjord waters. The hike takes approximately 1-2 hours, so start around 10 PM to arrive for optimal midnight light.
Skagsanden Beach offers black sand patterns that create leading lines toward the midnight sun. The wet sand reflects the colorful skies beautifully. This location also tends to be less crowded than some others, allowing for uninterrupted creative exploration.
For those seeking more adventurous options, Ryten Mountain provides elevated perspectives of Kvalvika Beach with the midnight sun. The 3-hour hike requires good fitness but rewards photographers with panoramic compositions impossible to achieve elsewhere.
💡 Pro Tips
- Visit locations during daytime first to scout compositions and understand safety considerations before returning for midnight shooting
- Check tide times—many beaches offer completely different compositional opportunities at high versus low tide
- Consider shooting the same location across multiple nights as weather conditions can dramatically alter the light quality

Technical Considerations for Midnight Sun Photography
The midnight sun creates several technical challenges that differ from both traditional daylight and night photography. Understanding these nuances will significantly improve your results.
Exposure Management: Despite being 'nighttime,' the abundant light can trick camera meters. I typically underexpose by 1/3 to 2/3 stops to preserve highlight detail in the sky, particularly when the sun is visible in the frame. Histogram checking becomes essential—the dynamic range can be extreme with bright skies and shadowed foregrounds.
White Balance Considerations: The midnight sun produces intensely warm light that cameras often misinterpret. While auto white balance might neutralize this warmth (removing the very quality that makes the light special), I prefer setting a manual kelvin temperature between 5000-5500K to preserve the golden glow while preventing excessive warmth that might appear artificial in post-processing.
Bracketing and HDR: The extreme dynamic range often exceeds what camera sensors can capture in a single exposure. I routinely bracket exposures (3-5 shots at 1-stop intervals) to blend in post-processing. Modern HDR software has become sophisticated enough to produce natural-looking results that preserve the unique lighting characteristics.
Long Exposure Techniques: The midnight hours offer perfect conditions for long exposure photography. Using a 6-10 stop ND filter can transform choppy seas into misty ethereal surfaces that contrast beautifully with the sharp mountain profiles. My technique involves calculating exposure times using a smartphone app, then adding 10-15% additional time to account for the light's lower intensity compared to daylight.
Focusing Strategies: The low-angle light reduces contrast, sometimes challenging autofocus systems. I've found that switching to manual focus and using live view magnification ensures critical sharpness. Focus stacking (taking multiple images focused at different distances and blending in post-processing) proves valuable when seeking front-to-back sharpness in challenging light conditions.

💡 Pro Tips
- Always shoot in RAW format to preserve maximum dynamic range for post-processing
- Consider using a remote intervalometer to capture the sun's movement across the landscape over several hours
- Check your histogram frequently as the light changes subtly but continuously throughout the night
Planning Your Midnight Sun Photography Trip
Successfully photographing Lofoten's midnight sun requires strategic planning beyond just technical camera knowledge. After multiple summer visits, I've developed a systematic approach to maximize photographic opportunities.
Timing Your Visit: The midnight sun is visible in Lofoten approximately from May 26 to July 17. However, I've found the optimal photography period to be June 5-30. Earlier, the phenomenon is just beginning; later, the sun starts dipping below the horizon again. The summer solstice (around June 21) provides the highest sun position at midnight.
Accommodations Strategy: Lofoten's popularity has exploded in recent years, making accommodation increasingly challenging. I recommend booking at least 6 months in advance. For photographers, I suggest basing yourself in the Reine/Hamnøy area for southern locations and around Leknes for northern beaches. My preference is renting traditional fishermen's cabins (rorbuer) which often provide direct water access for interesting foreground elements right outside your door. The Norway travel guide provides excellent accommodation recommendations across different budgets.
Transportation: Lofoten's photography locations are spread across the archipelago, making a rental car essential. Book well in advance, particularly for automatic transmission vehicles which are limited. The main E10 road is well-maintained, but many photography locations require driving narrow, winding roads. GPS navigation is reliable throughout the islands.
Sleep Management: The constant daylight presents a genuine challenge for maintaining a healthy sleep schedule. After my first visit left me exhausted from trying to photograph every midnight, I now bring a quality sleep mask and portable blackout blinds for accommodations with insufficient window coverings. I've adopted a split sleep schedule during these trips: 4-5 hours before midnight photography sessions and 3-4 hours after returning.
Weather Monitoring: Lofoten's weather changes rapidly. The Norwegian Meteorological Institute's 'Yr' app provides the most accurate forecasts. I've experienced completely different conditions just hours apart. Always have backup locations in mind if your primary destination experiences unfavorable conditions.

💡 Pro Tips
- Book accommodation with kitchen facilities—restaurant hours may not align with your midnight photography schedule
- Consider visiting slightly before or after peak season (early June or mid-July) for fewer crowds while still experiencing the midnight sun
- Join photography-specific tours or workshops if it's your first visit—local knowledge proves invaluable for maximizing limited time
Post-Processing for Midnight Sun Images
The unique lighting conditions of the midnight sun create both challenges and opportunities in post-processing. Having refined my approach over numerous trips, I've developed specific techniques to preserve the authentic feeling of this magical light.
Color Management: The midnight sun produces a distinctive color palette that requires careful handling. I begin by setting an appropriate white balance that preserves the golden glow without appearing artificially warm. Rather than globally increasing saturation (which can quickly appear unnatural), I selectively enhance colors through HSL adjustments, typically boosting oranges and yellows while slightly moderating blues to maintain balance.
Dynamic Range Processing: Midnight sun scenes often exceed what camera sensors can capture in a single frame. When working with bracketed exposures, I prefer a natural HDR approach using luminosity masks rather than automated HDR software. This technique allows precise control over transitions between highlights and shadows, preserving the directional quality of light that makes midnight sun photography so distinctive.
Controlling Contrast: The low-angle light creates pronounced shadows that can become problematic in post-processing. Rather than globally adjusting contrast, I work with targeted adjustments using radial and graduated filters. This preserves the dimensional quality of the light while preventing shadowed areas from becoming impenetrably dark.
Enhancing Atmospheric Elements: The midnight sun often creates atmospheric phenomena like light rays, mist, and atmospheric perspective. I subtly enhance these elements through careful dodging and burning techniques, following the natural light patterns present in the original capture.
Maintaining Authenticity: Perhaps most importantly, I strive to maintain authenticity in my midnight sun images. While the light itself seems almost otherworldly, excessive manipulation quickly betrays the genuine experience. My dental background has instilled a precision and respect for natural aesthetics that I apply to my photography—enhancing rather than fabricating the inherent beauty of these Arctic landscapes.

💡 Pro Tips
- Create a specific preset for midnight sun images as a starting point, then refine individual images
- Process images from the same location together to maintain consistency in color treatment
- Return to images after a few days with fresh eyes—it's easy to over-process the already vibrant midnight sun colors
Final Thoughts
Photographing the midnight sun in Lofoten represents one of the most unique opportunities in landscape photography—where technical skill meets artistic vision in a landscape that seems almost otherworldly. After five summers exploring these islands during the midnight hours, I continue to discover new perspectives and lighting conditions that challenge my photographic approach. The extended golden hour provides a rare luxury—time to experiment, refine compositions, and truly immerse yourself in the creative process without the typical rush of fleeting twilight moments. As you plan your own midnight sun adventure, remember that while equipment and technical knowledge are important, the most compelling images emerge when you allow yourself to be fully present in these magical moments. There's something profoundly moving about standing alone on a Arctic beach at 1 AM, bathed in golden light, with only the sound of gentle waves and distant seabirds. I invite you to experience this photographic pilgrimage for yourself—just remember to pack your sleep mask!
✨ Key Takeaways
- The midnight sun creates extended golden hour conditions perfect for landscape photography
- Technical challenges include extreme dynamic range and unique white balance considerations
- Strategic planning for sleep, weather, and locations maximizes photographic opportunities
- Post-processing should enhance rather than fabricate the natural magic of midnight sun light
📋 Practical Information
Best Time to Visit
June 5-30 (peak midnight sun period)
Budget Estimate
$2,500-3,500 for one week (excluding international flights)
Recommended Duration
7-10 days
Difficulty Level
Intermediate


Comments
nomadking
This is super helpful! I'm planning my first big photography trip and Lofoten keeps coming up. Never done anything like midnight sun before. Quick question - you mentioned a ND filter in the post, is that really necessary? I'm trying to keep my gear minimal since I'm still learning. Already have a decent camera and one lens. Should I invest in filters or just work with what I have?
Savannah Torres
You can definitely start without ND filters! The light is softer during midnight sun anyway. Focus on composition first, gear later.
redlife
Anyone know if the weather is usually cooperative in June or should I plan for rain? I've been to Norway twice before and got soaked both times lol
Hunter Thompson
Brilliant guide! I spent three weeks island hopping through Lofoten last summer on a shoestring budget and the midnight sun photography was absolutely mad. Slept in my tent during the "day" (which felt weird) and shot all "night." Pro tip: Uttisura viewpoint is a bit of a trek but you'll have it mostly to yourself compared to Reinebringen which gets absolutely mobbed. Also, the light changes SO fast even though the sun doesn't set - you'll see completely different colors every 20 minutes. Bring extra memory cards because you'll shoot way more than you think!
redlife
Uttisura is underrated for sure. Did you camp wild or use campsites?
Hunter Thompson
Mix of both mate. Wild camping is legal there as long as you're respectful. Campsites when I needed a proper shower!
wandernomad
Adding this to my bucket list!
islandzone
do you need a tripod for this or can you shoot handheld?
Savannah Torres
Katherine, this brings back such memories! We took our kids to Lofoten two summers ago and honestly, the midnight sun was magical but also challenging with little ones. Our 6-year-old refused to sleep because "it's still daytime, mom!" We ended up doing our photography sessions around 11pm-2am when they finally crashed. The golden light at midnight was absolutely worth the chaos though. One tip for families - bring blackout curtains or eye masks. Our Airbnb had them and they were lifesavers. The photos we got at Haukland Beach around 1am are still my favorites from any trip we've taken.
islandzone
lol the kid refusing to sleep, that's so real
wanderlusthero
Those photos are stunning!
greenninja
when exactly is the best time to go for this? like what dates?
Hunter Thompson
Late May through mid-July is your sweet spot! I went in early June last year and the light was absolutely mental. Sun literally never set properly.
greenninja
thanks! gonna try for june then
Ana Ahmad
Katherine, thank you for this detailed guide. Having photographed in Lofoten during both winter (for aurora) and summer (for midnight sun), I find the technical challenges quite different. For those planning a trip, I'd add that the midnight sun period isn't just about that magical hour - the quality of light remains extraordinary throughout the night, with subtle shifts in color temperature that reward patient observation. I found Kvalvika Beach offered incredible compositions with fewer photographers than the more famous spots. One practical tip: bring a lightweight tripod you won't mind carrying up those steep trails. My carbon fiber one was worth every penny for those long hikes to remote viewpoints.
Katherine Fisher
Excellent point about Kvalvika Beach, Ana! It does require that hike, but the reward is worth it. And yes, the light transitions throughout the night are subtle but magnificent for timelapse work.
globehero
Your shot of Reine with the midnight sun reflecting off the water is absolutely stunning! Definitely saving this guide for future reference.
Venture X
Premium card with 2X miles, $300 travel credit, Priority Pass