


Disclosure: This article contains affiliate links. We may earn a commission from purchases at no extra cost to you, which helps our travel content.
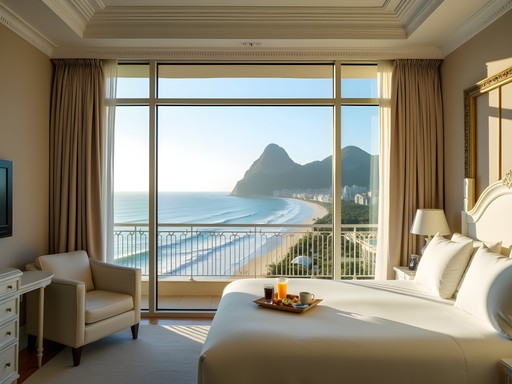
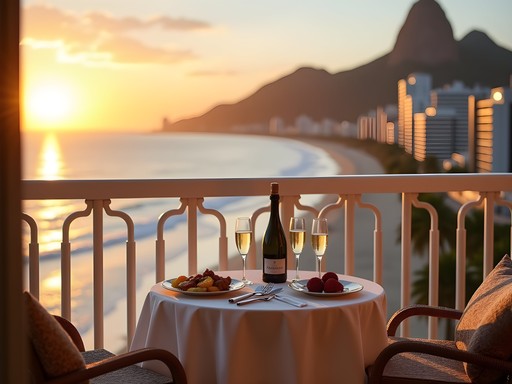
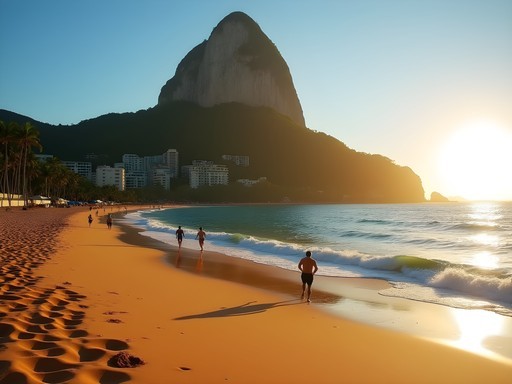
As I stepped onto my hotel balcony that first morning in Rio de Janeiro, the interplay of golden light against the dramatic topography immediately transported me back to my first dental conference in Brazil fifteen years ago. The city's unique geography—where lush mountains meet urban sprawl and azure coastlines—creates a photographer's paradise unlike anywhere else I've documented in my travels across five continents. While many visitors capture predictable postcard shots, my background in night photography and historical documentation has taught me that Rio rewards those who venture beyond the obvious. After numerous visits combining dental conferences with photographic expeditions, I've compiled this guide to help you capture Rio's soul through your lens, focusing on optimal timing, technical considerations, and those magical viewpoints where light and landscape converge in breathtaking harmony.

Essential Photography Gear for Rio's Challenging Light Conditions
Rio presents unique challenges for photographers—intense tropical sunlight creates harsh contrasts by day, while the city's illuminated landscapes demand technical precision by night. After years of documenting both scenarios, I've refined my equipment list to balance versatility with practicality.
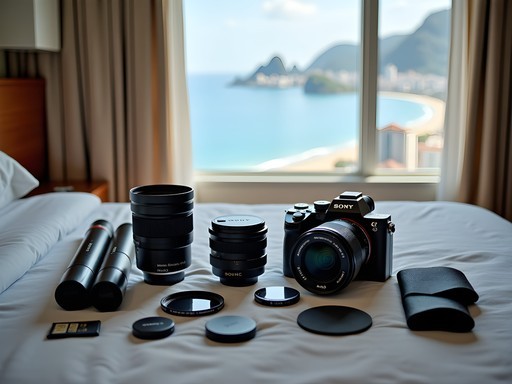
A quality mid-range camera with manual controls is non-negotiable. My Sony Alpha a7III has proven invaluable for its exceptional dynamic range, capturing both the bright highlights of Copacabana's white sand and the shadowed details of forested mountainsides in a single frame. For those on tighter budgets, the Sony a6400 offers similar capabilities in a more compact body.
Lens selection is crucial—I typically carry three: a 16-35mm wide-angle for dramatic landscapes and tight urban scenes, a versatile 24-70mm for general shooting, and a 70-200mm telephoto that's particularly useful for compressing the iconic skyline with Sugarloaf Mountain. The telephoto also allows you to capture candid moments during Carnival celebrations without intruding on performers.
Filters are often overlooked but essential in Rio's challenging light. A polarizing filter cuts glare from the ocean and enhances the already vibrant colors, while graduated neutral density filters help balance exposure between bright skies and darker foregrounds. For those magical blue hour shots of the city lights coming alive, a solid tripod is absolutely essential—I learned this lesson the hard way during my first visit when hand-held twilight shots of Guanabara Bay proved disappointingly blurry despite my steady dentist's hands.

💡 Pro Tips
- Pack a microfiber cloth to combat lens condensation when moving between air-conditioned buildings and Rio's humidity
- Bring twice as many memory cards as you think you'll need—Rio inspires prolific shooting
- A lightweight rain cover for your camera is essential during summer's sudden downpours
Christ the Redeemer: Beyond the Tourist Snapshot
The iconic Cristo Redentor statue atop Corcovado Mountain presents both opportunity and challenge for photographers seeking unique perspectives. Having visited at various times across multiple trips, I've discovered timing is everything for capturing this symbol of Rio without battling selfie sticks and tour groups.
Arriving for the first tram at 8:00 AM provides a brief window of relative tranquility before the crowds descend. However, my most successful images have come from late afternoon visits (around 4:00 PM) during Rio's winter months (June-August), when dramatic cloud formations often frame the statue and the lower angle of sunlight creates compelling shadows across the monument's features.
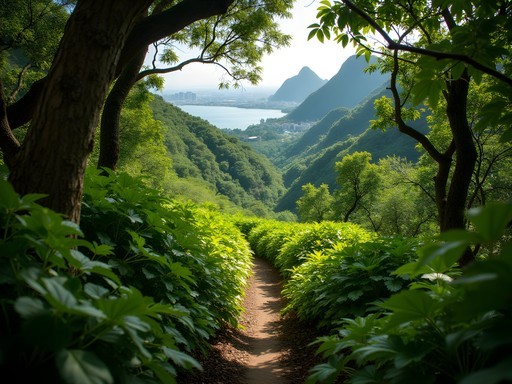
Rather than merely photographing the statue itself, consider using it as a dramatic foreground element framing the city below. The northeastern viewing platform offers particularly compelling compositions with Sugarloaf Mountain and Guanabara Bay in the background. For something truly different, hike the Parque Lage to Corcovado trail early morning to capture the statue emerging from morning mist—a challenging 2.5-hour ascent but one that rewards with perspectives few tourists ever see.
Technically speaking, the extreme brightness of the white concrete against Rio's often hazy sky creates exposure challenges. I recommend bracketing your exposures (taking multiple shots at different exposure values) to ensure you capture detail in both the statue and the sky. This is precisely where my Black Diamond Alpine Carbon Cork Trekking Poles prove invaluable for the hike up, while providing stability for my camera when shooting from uneven terrain along the trail.
During my last visit coinciding with the International Dental Congress, I experimented with long-exposure night photography from the Mirante Dona Marta viewpoint. This intermediate lookout provides a unique side angle of the illuminated statue against the city lights—a perspective that connects Rio's spiritual icon with its vibrant urban energy below.

💡 Pro Tips
- Purchase tram tickets online in advance to secure early morning or late afternoon slots
- Bring a telephoto zoom to capture detailed shots of the statue's face from the viewing platforms
- Visit on slightly overcast days for more balanced exposures and fewer harsh shadows
Sugarloaf Mountain: Optimal Timing for Photographers
Pão de Açúcar (Sugarloaf Mountain) offers perhaps the most versatile photographic opportunities in Rio, with its 360-degree views and two-stage cable car system providing multiple perspectives. Having photographed this landmark across different seasons and times of day, I've developed a precise strategy for maximizing photographic potential.
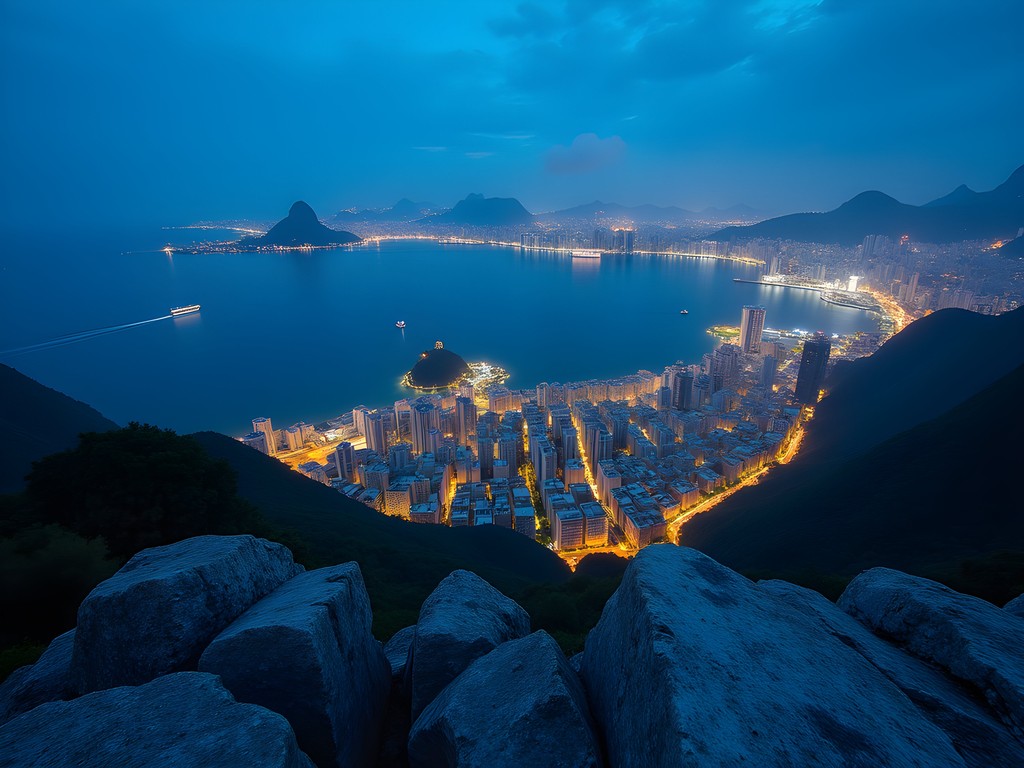
Contrary to popular advice, I don't recommend sunrise visits. While beautiful, the morning haze often obscures detail. Instead, I suggest arriving approximately 90 minutes before sunset to secure your position. This timing allows you to capture three distinct phases of light: the warm afternoon glow on the city and beaches, the magical blue hour as city lights begin to twinkle, and finally the full nightscape of illuminated Rio.
The intermediate cable car stop at Morro da Urca is often overlooked but provides superior compositions of Sugarloaf itself against Corcovado in the distance. I typically spend an hour here before continuing to the summit for sunset and blue hour. This approach requires patience but yields two distinct sets of images from one excursion.
From a technical perspective, bring a sturdy yet lightweight tripod for the blue hour and night photography—the Peak Design Travel Tripod has been my constant companion for five years, offering remarkable stability despite its compact size when folded. The viewing platforms can become crowded, so this tripod's small footprint proves invaluable.
During my last winter visit, I discovered an unexpected photographic opportunity by taking the last cable car down (typically around 8:30 PM). The descent offers extraordinary night views of illuminated Botafogo Bay that few tourists capture, as most hurry down earlier for dinner reservations. This perspective reminded me of Hong Kong's Victoria Peak tram descent—another favorite from my dental conference travels—but with Rio's distinctive topography creating a more dramatic interplay of light and shadow.
💡 Pro Tips
- Purchase the cable car ticket that allows multiple rides in one day to maximize shooting opportunities
- Bring a small LED light to illuminate your camera settings in the darkness after sunset
- Position yourself on the north side of the summit platform for the best blue hour compositions

Hidden Gems: Lesser-Known Photographic Vantage Points
While Rio's postcard viewpoints deservedly attract photographers, my dental conference schedule has often forced me to explore during unconventional hours, leading to discoveries of lesser-known vantage points that offer equally compelling photographic opportunities without the crowds.
Mirante Dona Marta provides what I consider the perfect balance of accessibility and photographic potential. This intermediate viewpoint on the road to Corcovado offers a unique perspective with Christ the Redeemer, Sugarloaf, and the beaches all visible in one sweeping panorama. Accessible by taxi (approximately 25 reais from Copacabana), this location is particularly stunning at sunset when the low light creates a golden glow across the landscape. Unlike the major attractions, you'll often find yourself sharing this space with local photographers rather than tour groups.
For those interested in architectural photography, the Museum of Modern Art features a geometric concrete design by architect Affonso Eduardo Reidy that creates fascinating shadow patterns throughout the day. The museum's gardens, designed by Roberto Burle Marx, offer compelling foreground elements framing the bay beyond. I spent a fascinating afternoon here after a dental materials conference, experimenting with my Tiffen Variable ND Filter to create long exposures even in bright daylight, giving the moving clouds a dramatic streaking effect above the static concrete forms.
Perhaps my most serendipitous discovery came during a morning jog through Parque da Cidade in Niterói. This elevated park across Guanabara Bay provides a completely different perspective of Rio's skyline with Sugarloaf and Corcovado aligned—perfect for sunrise photography when the first light illuminates the city while the foreground remains in gentle shadow. The ferry journey to Niterói itself offers wonderful photographic opportunities reminiscent of my beloved European maritime crossings, particularly if you time your return trip for late afternoon when the light softens across the bay.

💡 Pro Tips
- Visit Mirante Dona Marta on weekdays to avoid weekend crowds of local photographers
- Bring a zoom lens to Parque da Cidade to compress Rio's skyline with Sugarloaf Mountain
- The Niterói Contemporary Art Museum itself forms a compelling UFO-like foreground element for skyline shots
Mastering Rio's Challenging Night Photography
Rio de Janeiro transforms dramatically after sunset, presenting both magnificent opportunities and technical challenges for photographers. Having specialized in night photography across European cities, I found Rio's combination of illuminated landmarks, reflective water, and mountainous topography creates uniquely complex lighting scenarios requiring specific techniques.
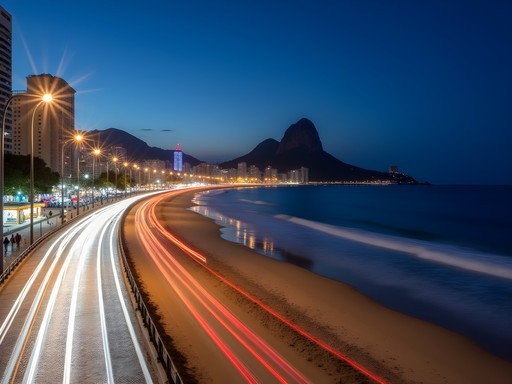
The city's famous beaches take on a completely different character at night. Copacabana's curved promenade with its distinctive Portuguese pavement pattern creates leading lines that draw the viewer's eye through long-exposure images. Position yourself near Copacabana Fort around 9:00 PM when the beachfront kiosks are illuminated but some ambient light remains in the sky. A 15-20 second exposure at f/8 (ISO 100) captures the movement of waves while keeping the promenade sharp.
For cityscape photography, Rio's elevated viewpoints present exposure challenges due to extreme brightness variations. I've found manual blending of multiple exposures essential—typically three shots (for shadows, mid-tones, and highlights) combined in post-processing. The Neewer Carbon Fiber Tripod has proven invaluable for this work, offering stability in Rio's occasionally breezy evening conditions.
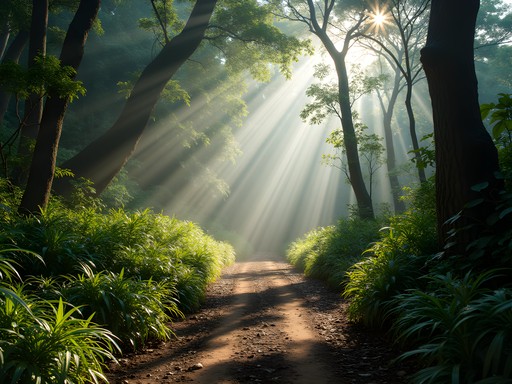
One of my most successful night photography sessions occurred during a full moon coinciding with my visit to the Royal Portuguese Reading Room (for a dental history research project). After my research, I headed to Vista Chinesa viewpoint, where the moonlight illuminated the forested mountains while city lights twinkled below—a magical combination rarely seen in conventional Rio photography. The key was using a moderate ISO (800) rather than extremely long exposures, preserving detail in the foliage while still capturing the city lights.
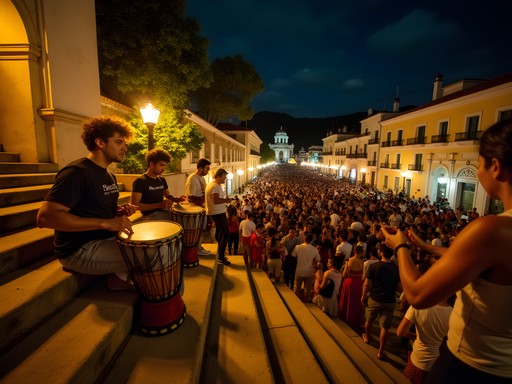
During Carnival season, the Sambadrome offers extraordinary night photography opportunities. Rather than focusing solely on the performers, try capturing the dynamic interaction between participants and spectators. A fast prime lens (f/1.8 or wider) allows you to work with available light, preserving the authentic atmosphere without disrupting the celebration with flash photography.

💡 Pro Tips
- Use a remote shutter release to minimize camera shake during long exposures
- Set your white balance manually to 'tungsten' to preserve the warm glow of Rio's street lighting
- Experiment with 'light painting' techniques along the beach promenades using passing car headlights
Final Thoughts
Rio de Janeiro offers photographers an extraordinary canvas where natural and urban elements converge in dramatic harmony. As I've discovered through years of combining dental conferences with photographic exploration, the city rewards those who approach it with technical preparation and creative patience. Whether you're capturing the golden light washing over Sugarloaf Mountain, experimenting with night exposures along Copacabana's curved shoreline, or discovering your own unique vantage points across this magnificent cityscape, Rio consistently delivers images that evoke its unique spirit. I encourage you to rise early, stay out late, and venture beyond the obvious viewpoints—your photographic portfolio will be richly rewarded with images that capture not just Rio's iconic landmarks, but the magical interplay of light, landscape, and vibrant energy that defines this extraordinary city. As I prepare for my next dental symposium in South America, I'm already planning an extended layover in Rio to document the changing seasonal light of early spring—perhaps our paths will cross at one of these magnificent viewpoints.
✨ Key Takeaways
- Timing is critical—visit major landmarks at less popular times (early morning or late afternoon) for the best light and fewer crowds
- Rio's dramatic topography creates unique challenges for exposure—bracketing shots and post-processing are essential skills
- Look beyond the postcard views to discover lesser-known vantage points that offer fresh perspectives on familiar landmarks
- Night photography reveals a completely different character of Rio that many visitors miss by returning to their hotels after sunset
📋 Practical Information
Best Time to Visit
June-August (Rio's winter) for clearest skies and comfortable temperatures
Budget Estimate
$150-200/day including mid-range accommodation, transportation, and cable car tickets
Recommended Duration
5-7 days minimum to capture diverse lighting conditions
Difficulty Level
Intermediate - Some Locations Require Moderate Hiking And Technical Photography Skills

Comments
winterqueen
This is so helpful! I'm heading to Rio in March with my husband and we're both amateur photographers. Quick question - did you feel safe carrying your camera gear around? I've heard mixed things about safety in Rio and I'm a bit nervous about walking around with expensive equipment. Also, were the lesser-known spots you mentioned easy to find or should we book a guide?
Katherine Fisher
Great question! I stayed aware of my surroundings and didn't flash expensive gear unnecessarily. Uber between spots helped. The hidden viewpoints are pretty well-marked once you're in the neighborhoods. Have an amazing trip!
globepro7165
Pro tip - go to Sugarloaf late afternoon. Stay for sunset then the city lights coming on
mountainperson
Oh that's a great idea!
Casey Andersson
Absolutely stunning guide! I visited Rio during Carnival last year and stayed at the Belmond Copacabana Palace - their concierge arranged a private sunrise helicopter tour that gave me access to angles I never would have gotten otherwise. Your section on challenging light conditions is spot on. Rio's contrast between bright beach light and shadowy favelas is tricky. I found that shooting in RAW and having my camera bag with extra memory cards was essential since I was constantly bracketing exposures. The investment in a good polarizing filter also made a huge difference with all that water and sky.
photomaster
What lens did you use for the Sugarloaf shots?
Zoe Dixon
Katherine, this brings back so many memories! I was in Rio last year and completely agree about those hidden gems you mentioned. I stumbled upon Parque das Ruínas in Santa Teresa completely by accident and got some of my favorite shots of the entire trip. The sunset view over the bay from there is just unreal. One thing I'd add for backpackers - the local buses to these viewpoints are super cheap and the drivers are usually happy to tell you where to get off. Saved me a fortune compared to taxis!
winterqueen
Good to know about the buses! I was worried about getting around
globeking
What time did you get to Christ the Redeemer for those shots? Trying to avoid crowds
Katherine Fisher
I got there right when it opens at 8am! The light is softer then too. Weekdays are definitely better than weekends.
globeking
Perfect, thanks!
mountainperson
Those sunrise shots are incredible!
BeachDreamer
Those sunset colors are unreal! 😍
TravelWithLens
Pro tip for anyone heading to Rio: the Two Brothers Mountain (Dois Irmãos) hike gives you an incredible view of the beaches that most tourists miss. Start early and bring plenty of water!
wildzone
Is that hike difficult? I'm not super fit but want those views!
TravelWithLens
It's moderate - takes about 1.5 hours up. Some steep sections but plenty of places to rest. The trail is well-marked. Totally worth it even if you take it slow!
SunsetChaser
That shot of Ipanema Beach at sunset is incredible! What time of year were you there?
Katherine Fisher
Thank you! I was there in late September, which was perfect - fewer tourists and beautiful clear days.
Venture X
Premium card with 2X miles, $300 travel credit, Priority Pass